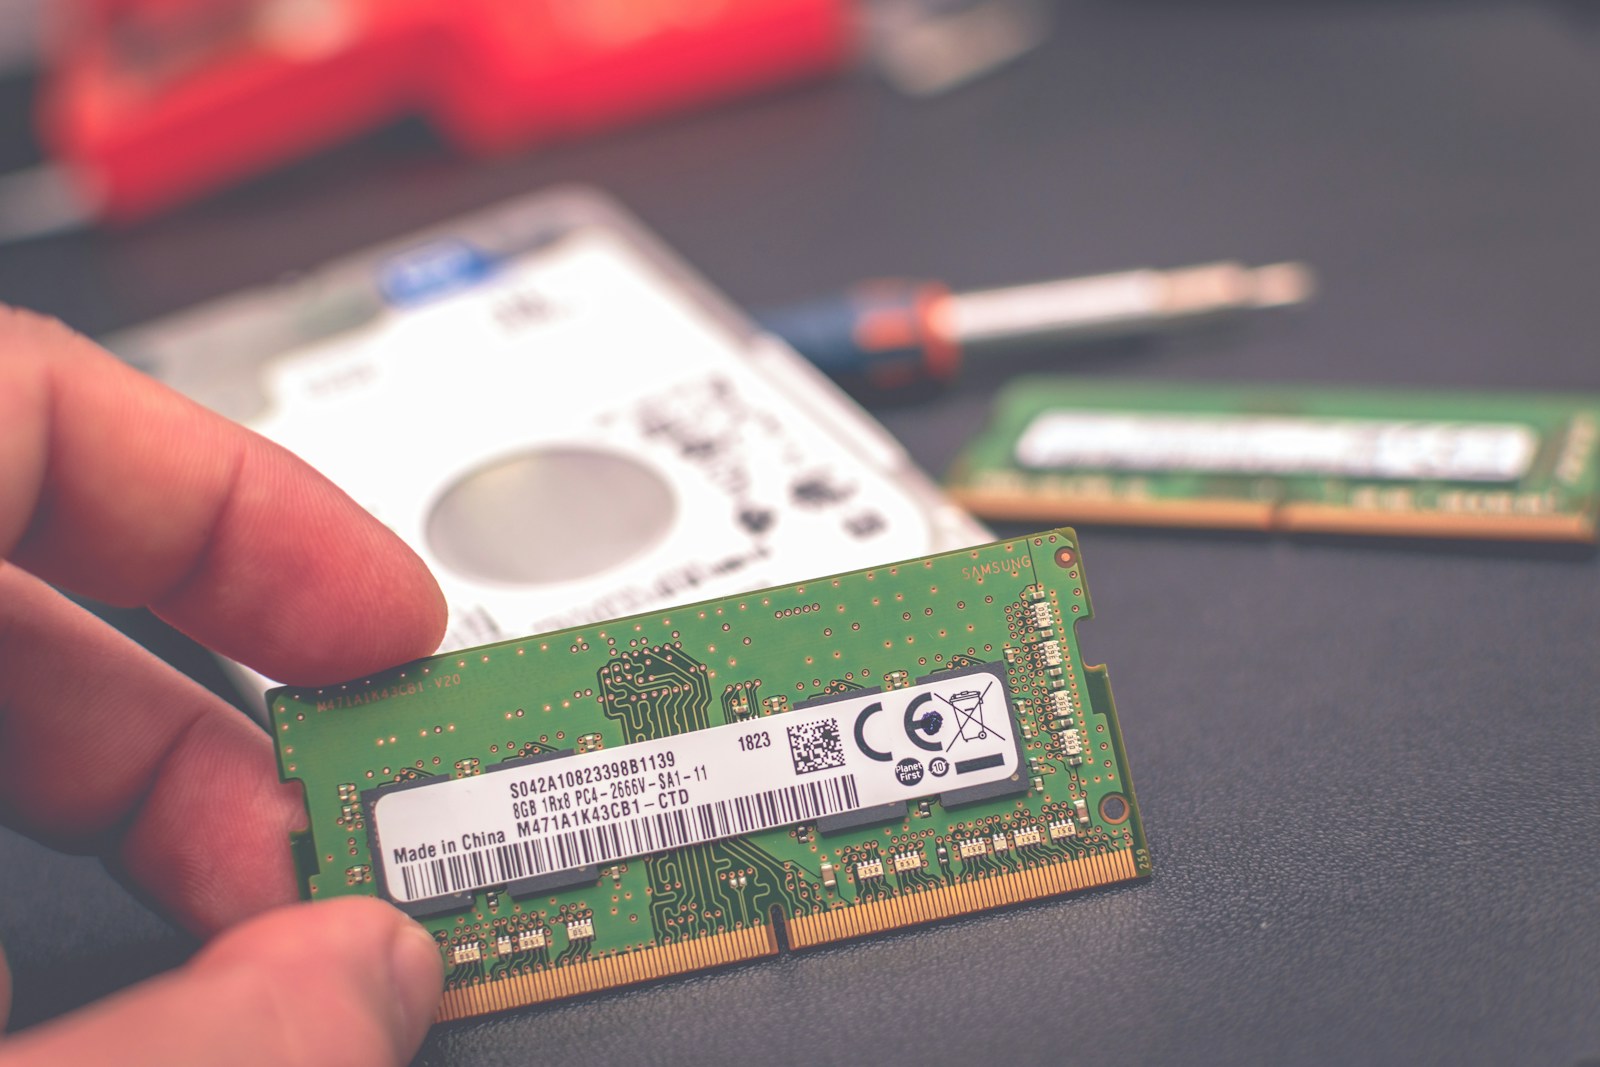
High RAM/Memory usage on Windows 11 can lead to sluggish performance and decreased productivity. Here are several steps you can take to address and fix high RAM/Memory usage on your system.
Table of Contents
1. Restart System
A simple restart can clear out temporary files and close background processes that might consume memory. This can often solve high RAM/Memory usage issues without further intervention.
2. Find any integrity violations
The problem of high RAM/Memory usage in Windows 11 may occur if there are any mistakes on your hard disk. You may check the file system and resolve some issues with specific settings by running CHKDSK on the command prompt.
- Open Start.
- Search for Command Prompt, right-click the top result, and select the Run as administrator option.
- Type “chkdsk /f C:” and press Enter (replace “C:” with the letter of the drive you want to check if it is not your system drive.)
- Press “Y” when prompted to schedule the disk check on the next restart.
- Restart your PC.

- The disk check will run automatically on startup and check for any issues with the disk.
- If any issues are found, they will be fixed automatically.
3. Disable unnecessary apps on the startup
Many programs are set to start automatically when your computer starts up, which may cause high RAM/Memory usage issues. You may deactivate unwanted beginning processes using the Task Manager:
- To open the task manager, press Shift+Ctrl+Esc simultaneously, or right-click on the taskbar and select “Task Manager“.
- Go to the “Startup apps” tab in the Task Manager window.
- Disable any programs that should not run automatically by right-clicking on them and selecting “Disable.”

4. Uninstall unnecessary apps
An excessive number of programs running at once may be the cause of high RAM/memory usage. You must terminate pointless programs if you want to drastically minimize this.
- Right-click on the Start button.
- Select Installed Apps from the menu.
- Locate your third-party security software in the list.
- Click on it and select Uninstall.

5. Clean up Disk
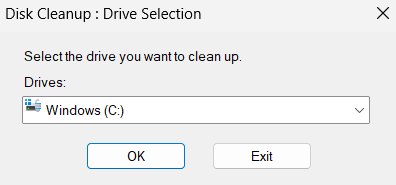
Use Disk Cleanup to remove temporary files and system cache:
- In the search box, type Disk Cleanup by pressing Win + S.
- Choose the most appropriate option to initiate Disk Cleanup.
- From the drop-down list, select the desired drive.
- To delete files, choose them from the Files to delete column and click OK.
6. Run a System Scan
A System File Check (SFC) scan can help identify and repair corrupted system files that may be causing “high RAM/Memory usage” issues. The DISM is another tool you can try out; while it’s not exactly like SFC, it functions almost identically.
- Open Start.
- Search for Command Prompt, right-click the top result, and select the Run as administrator option.
- Type the following commands to perform a quick fix on your PC: sfc /scannow
- Be patient and wait till the scanning is complete.

7. Disable Sysmain service
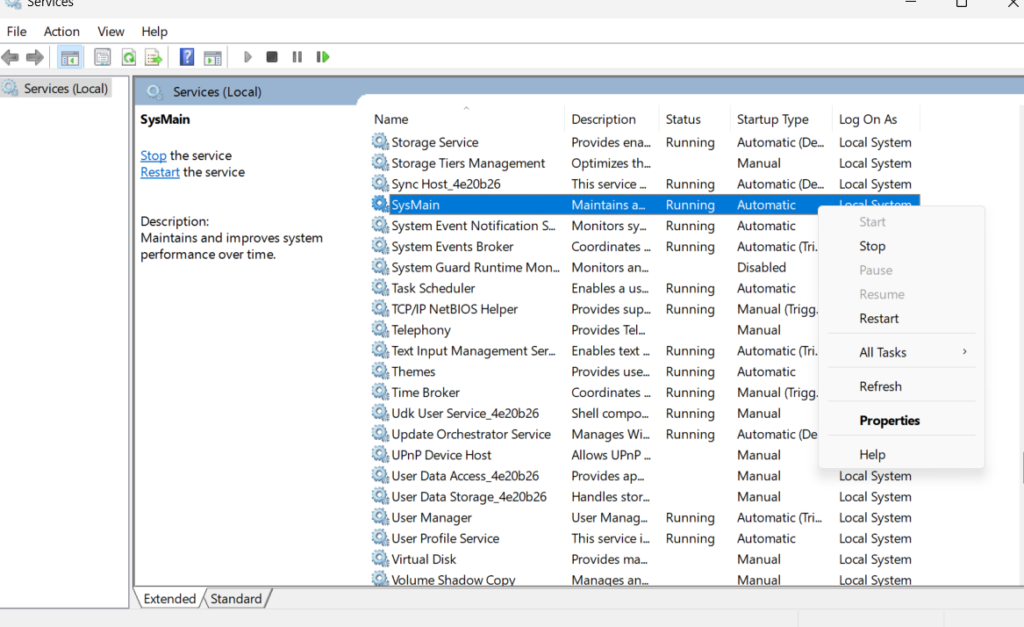
SysMain (previously known as Superfetch) can sometimes cause high RAM/Memory usage:
- Press Win + R, type
services.msc, and press Enter. - Locate SysMain, right-click, and select Stop.
- Right-click again, select Properties, and set the Startup type to Disabled.
8. Modify the Registry Key
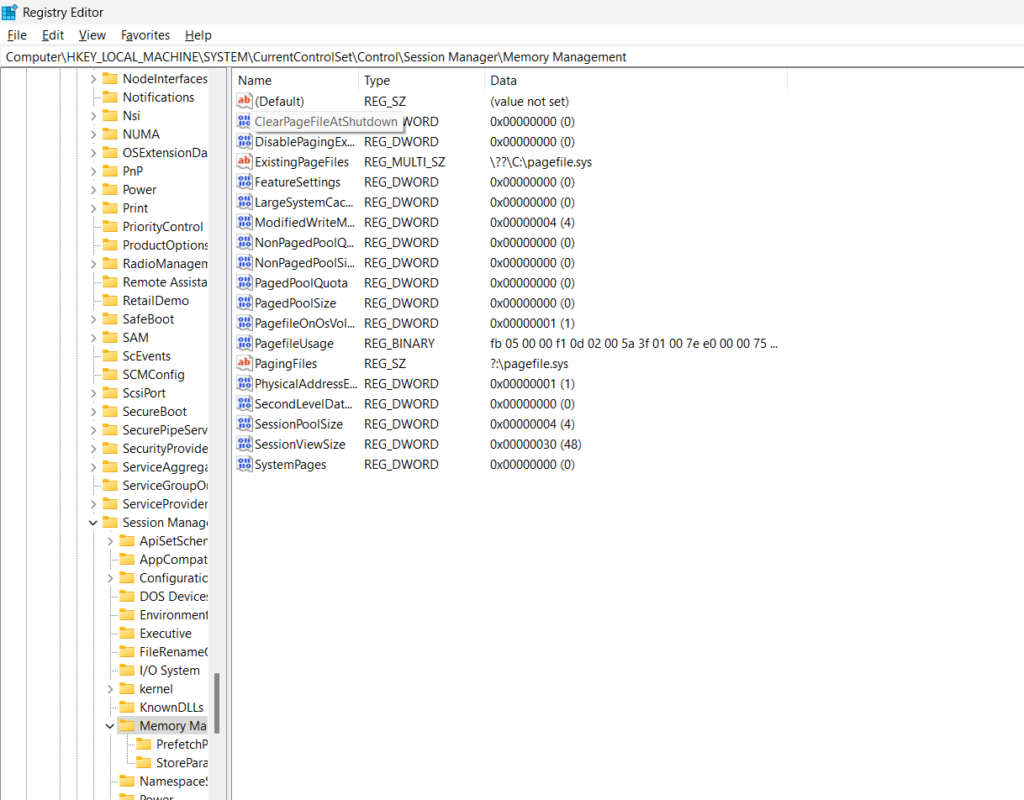
To reduce high RAM/Memory usage, you can alternatively use the “Adjust for best performance” option. This enables you to exchange something. Advanced users can modify registry settings to improve performance:
- Press Win + R, type
regedit, and press Enter. - Navigate to
HKEY_LOCAL_MACHINE\SYSTEM\CurrentControlSet\Control\Session Manager\Memory Management. - Modify relevant keys such as
ClearPageFileAtShutdownandLargeSystemCache. - right-click to modify its Value data.
- Click Save And Reboot your device.
9. Make A Registry Backup
Before modifying the registry, always make a backup:
- In the Registry Editor, select File > Export.
- Choose a location, name the file, and click Save.
10. Backing Up Memory
Use third-party software to create memory backups if necessary. This is typically more advanced and used in enterprise environments.
11. Task Manager
Task Manager can help you identify processes consuming excessive memory:
- Press Ctrl + Shift + Esc to open Task Manager.
- Go to the Processes tab.
- Sort by memory usage to find the culprit processes.

12. Optimize Your Drives
Regularly optimize and defrag your drives:
- Open File Explorer, right-click on the drive and select Properties.
- Go to the Tools tab and click Optimize.

13. Select Best Performance Options
Adjust system settings for best performance:
- Go to Settings > System > About.
- Click Advanced system settings.
- Under Performance, click Settings and select Adjust for best performance.

14. Defrag Your Hard Drives
Ensure your hard drives are defragmented:
- To access the Start menu, click the search button and type “defragment and optimize drives.” To get started, click the best match result.
- The drive is visible here. After selecting the one to defragment, select the Optimize option.
- Await the completion of the defragment.
- After you’re done, restart your computer to check if there is a decrease in memory consumption.
15. Increase Total Paging File Size
To lower the high RAM/memory usage by Windows 11/10, you must raise the total paging file size, which is located under the ‘Virtual memory’ tab. How to do it is as follows:
- Go to Settings > System > About.
- Click Advanced system settings, then Settings under Performance.
- Go to the Advanced tab and click Change under Virtual memory.
- Adjust the paging file size according to your needs.

16. Increase Virtual Memory
Increasing virtual memory is one way that some users have addressed Windows 11’s high RAM/memory usage. This is something you can try as well.
- Go to Settings > System > About.
- Click Advanced system settings, then Settings under Performance.
- Go to the Advanced tab and click Change under Virtual memory.
- Uncheck the option
Automatically manage paging file size for all drives. - Select the drive where you want to change the paging file size.
- Choose the option
Custom size.

17. Common Software Problems
Update or uninstall problematic software that may cause high RAM/Memory usage. Look for patches or updates from the software vendor.
18. Run a Virus Scan/Clean
Malware and viruses can cause high RAM/Memory usage. Conduct a complete computer scan using an authorized antivirus or antimalware tool to check for issues.
- Type “Windows Security” in the Windows search bar and select “Windows Security” from the results.
- In the Windows Security window, click on “Virus & Threat Protection.“
- Under “Current threats,” click on “Quick Scan” to perform a basic scan.
- For a more comprehensive scan, you can choose “Full Scan.“
- Follow the on-screen instructions to complete the scan.
- If any threats are detected, Windows Defender will provide options to remove or quarantine them.

19. Increase RAM capacity
If you frequently run out of memory, consider adding more RAM to your system. This is a hardware upgrade that can significantly improve performance.
20. Reinstall or Roll Back Windows
If all else fails, consider reinstalling or rolling back Windows:
- Restart your computer after inserting the installation disk.
- When the computer boots into BIOS, press a certain key (often F2 or F11) to change the boot order so that your computer boots from the installation disk.
- When the page has loaded, click Install now, and then proceed as directed to finish the procedure.

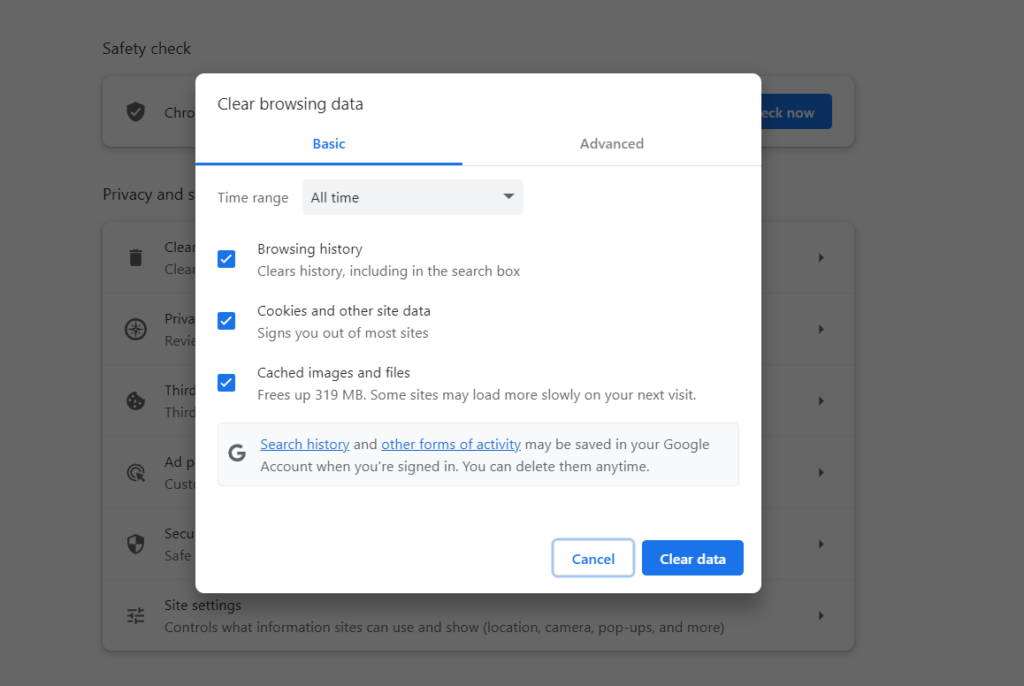
21. Clear RAM cache
Clearing the RAM cache can help solve high RAM/Memory usage:
- Open Google Chrome.
- Press
Ctrl + Shift + Deleteto open the “Clear browsing data” window. - Select the time range to “All time” to clear all data.
- Check the boxes next to “Browsing history,” “Cookies and other site data,” and “Cached images and files.”
- Click on “Clear data.“
22. Update Windows 11
Every operating system update can resolve certain unforeseen computer problems. Try updating your Windows operating system if the options provided above don’t resolve the high RAM/Memory usage issue.
- Press Win + I to open the Windows Settings.
- Click on Update & Security.
- In the Update & Security window, click on Windows Update in the left-hand menu.
- Click on Check for updates and let Windows search for and install any available updates.
- After the updates are installed, restart your computer and check if the brightness control function keys are functioning correctly.

23. Clean Boot
By doing a clean boot, the high RAM/Memory usage problem in Windows 11 can be fixed. By doing this, you will be able to identify precisely which service is responsible for your computer’s high RAM/Memory usage problem.
- Press the Windows key + R to open the Run dialog box.
- Type “msconfig” and press Enter to open the System Configuration.
- In the System Configuration window, go to the “Services” tab.
- Check the box that says “Hide all Microsoft services.“
- Click the “Disable all” button.

- Next, go to the “Startup” tab and click on “Open Task Manager.“
- In the Task Manager window, disable all the startup programs by right-clicking on each entry and selecting “Disable.”

- Close the Task Manager and go back to the System Configuration window.
- Click “OK” and then restart your computer.
24. Fix for Chrome
High memory usage by applications like Chrome can be a high RAM usage issue.
- Ensure you are running the latest version of Chrome. Go to
Settings > About Chromecheck for updates. - Each tab in Chrome consumes memory. Close tabs that are not in use.
- Press
Shift + Escto open Chrome’s Task Manager. - End processes that are consuming too much memory.
- Go to
Settings > Extensionsand disable or remove extensions that you do not need. - Go to
Settings > Advanced > Systemand toggle onUse hardware acceleration when available. - Go to
Settings > Privacy and Security > Clear browsing data.SelectCached images and filesandCookies and other site data, then clickClear data. - Type
chrome://flagsin the address bar and press Enter. - Search for and disable
Automatic tab discarding.
25. Disable Skype Prefetch
Here are some solutions to reduce high RAM usage, including disabling Skype Prefetch.
- Press
Ctrl + Shift + Escto open Task Manager. - Go to the
Startuptab and disable Skype. - Open Skype and go to
Settings > General. - Turn off
Automatically start SkypeandLaunch Skype in the background. - Press
Win + R, type%appdata%\Microsoft, and press Enter. - Find and delete the
Skypefolder. - Open Task Manager and end Skype processes that are not needed.
By following these steps, you can effectively manage and reduce high RAM usage on your Windows 11 system, ensuring smoother performance and better overall efficiency.


